
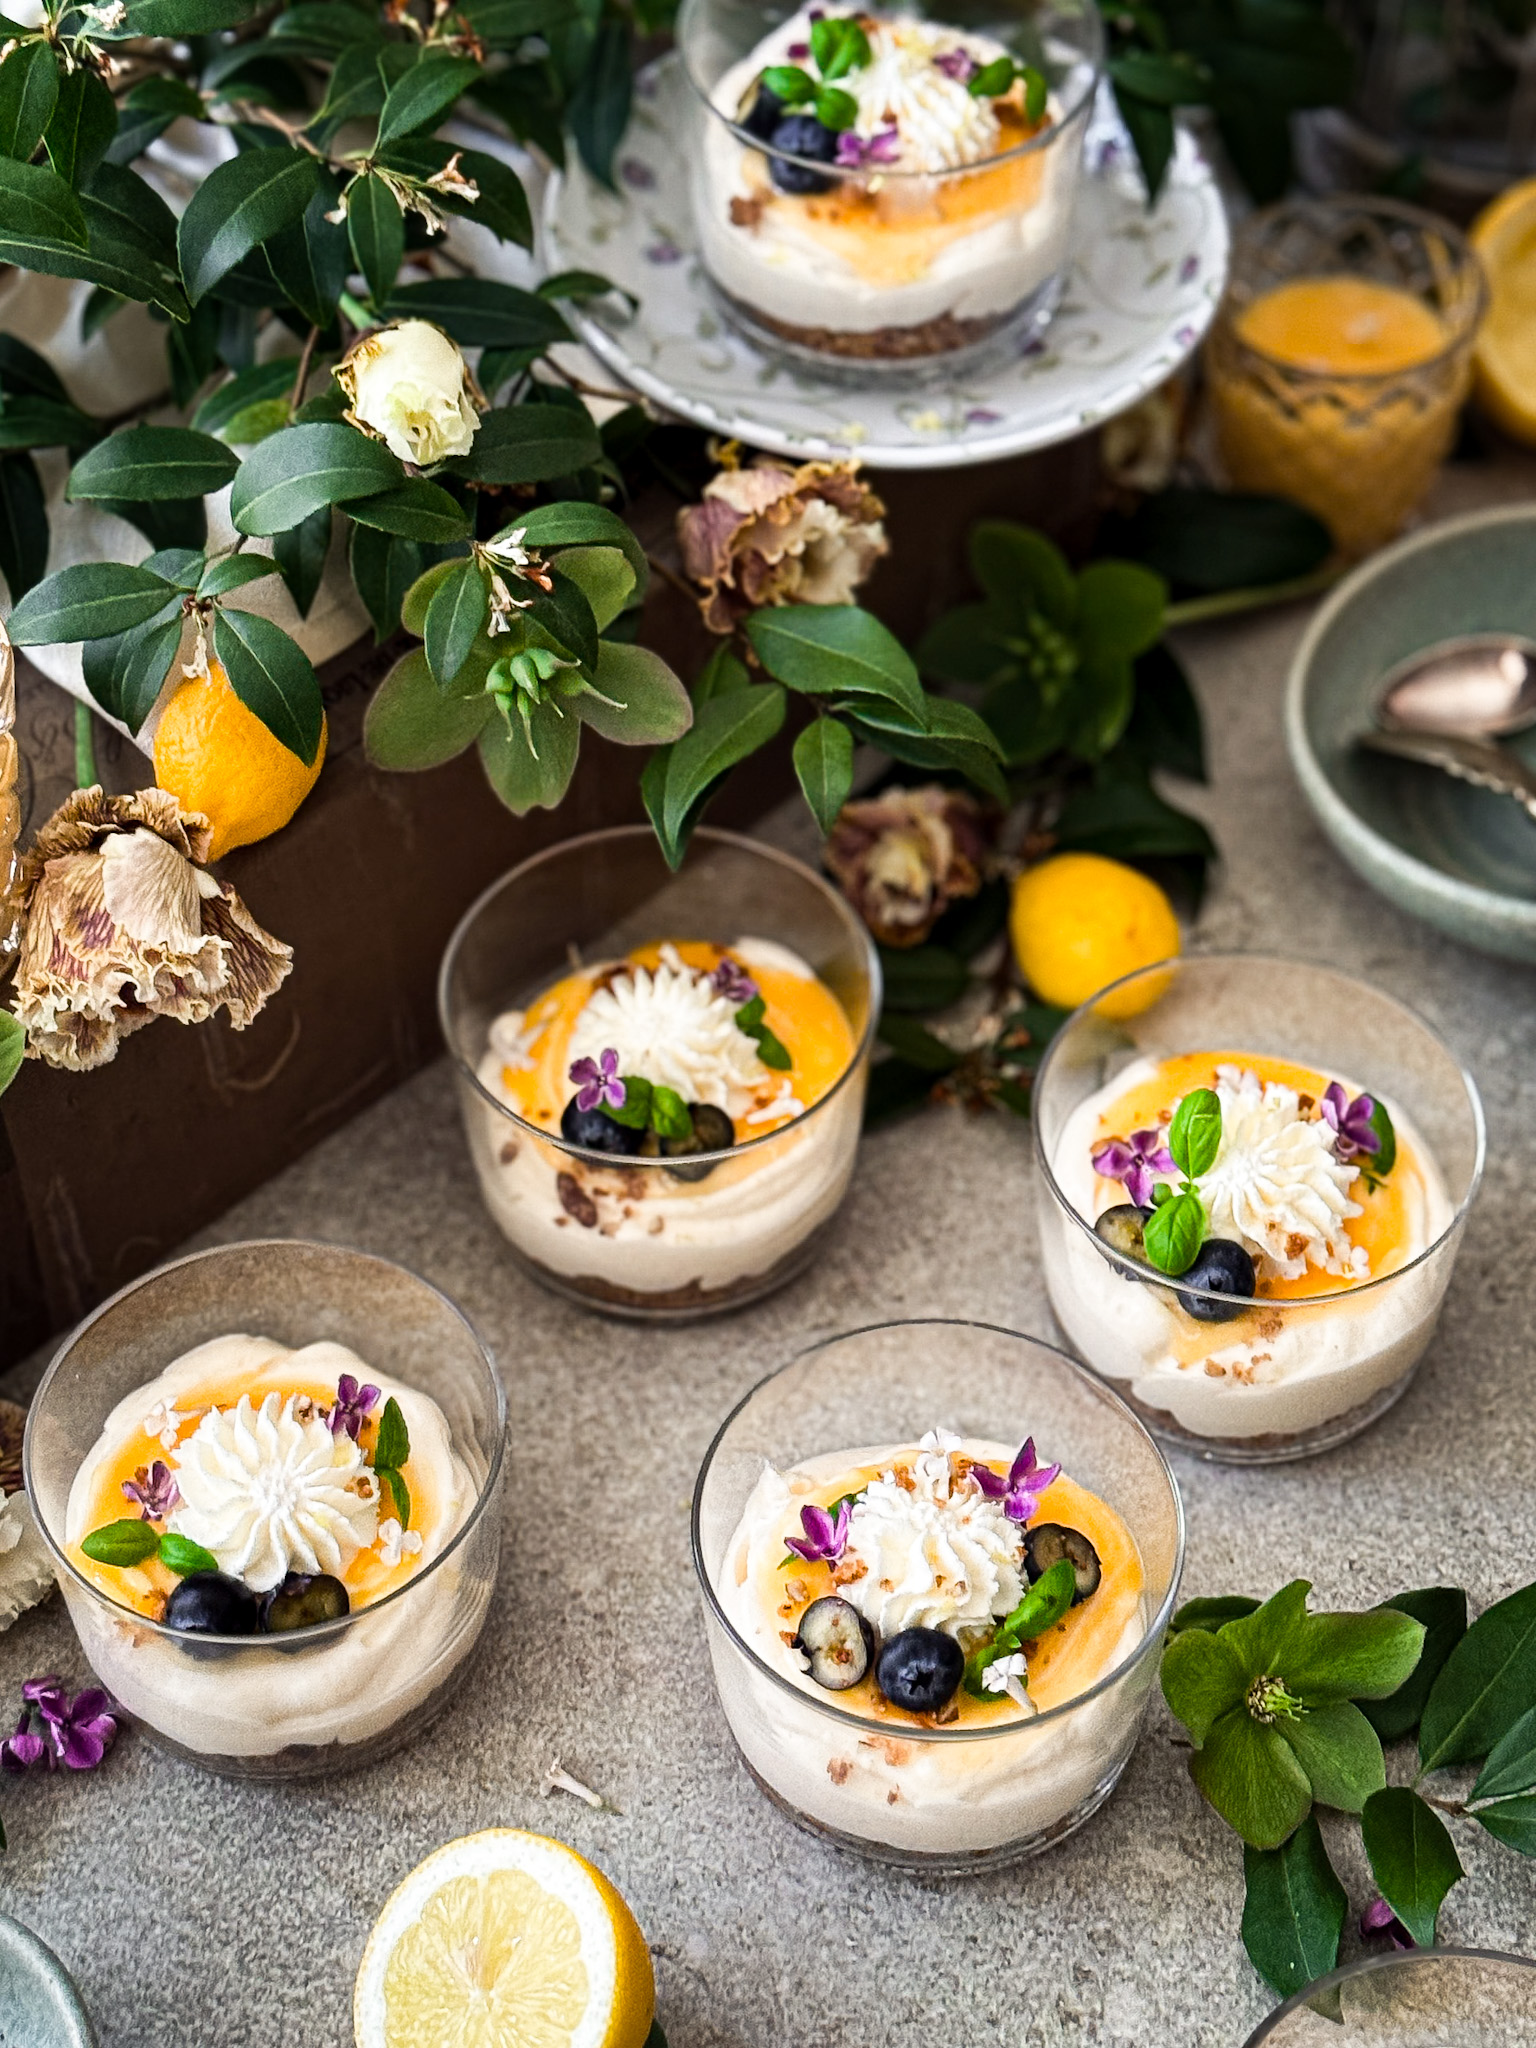
Desserts served in jars have a particular kind of charm. Something about the layers visible through the glass, the personal portion, the sense that whoever made it was paying attention.
This Creamy Lemon Curd Mousse is exactly that kind of dessert. Light but rich, sharp but smooth, familiar but just different enough to make people pause between spoonfuls.
The base is a quick mix of digestive biscuits, almonds, coconut and brown sugar, toasted until golden and pressed gently into each jar. Buttery and crunchy, like the bottom of a tart but more relaxed about it. The mousse sits on top silky, airy and bright with lemon, made with ricotta, whipped cream and a generous swirl of homemade lemon curd. The kind of texture that almost vanishes on the tongue.
No gelatine, no fuss. Just spoon, chill and serve. It looks like effort. It really isn’t.
And if you made the lemon curd from our recent recipe this is exactly what you have been saving it for.
Why You’ll Love This Recipe
- It makes ahead beautifully and tastes even better the next day once everything has had time to settle and the flavours have deepened.
- No gelatine, no specialist equipment and no complicated technique. It comes together with very little effort and very little washing up.
- The base sets it apart from most mousses. That toasted biscuit and coconut crunch beneath the cream makes every spoonful feel considered rather than just a bowl of something sweet.
- It works just as well for a dinner party as it does made for one on a quiet evening. The jar format makes it feel personal without any extra effort.
Ingredients Used to Make Lemon Curd Mousse
- Ricotta. Smooth, mildly rich and the quiet foundation of the mousse. It blends seamlessly with the lemon curd and whipped cream without ever taking over.
- Heavy cream. Whipped to soft peaks, it gives the mousse its lightness and structure. No gelatine needed — the whipped cream does that work on its own.
- Lemon curd. The heart of this recipe. Sharp, bright and creamy all at once. If you made our homemade lemon curd from scratch, this is exactly what it was made for.
- Vanilla essence. Just enough to soften the citrus edge and round out the flavour without drawing attention to itself.
- Icing sugar. A light touch only. It sweetens the cream without affecting the texture or making the mousse feel heavy.
For the Base
- Digestive biscuits. The foundation. Crumbly, buttery and familiar. Graham crackers or oat biscuits work well as a substitute if needed.
- Brown sugar. Adds depth and a quiet hint of caramel warmth to the base layer.
- Shredded coconut. For extra flavour and texture. Toast it lightly before mixing for a deeper nuttiness that comes through in every spoonful.
- Chopped almonds. A soft crunch that runs through the base. Flaked almonds or pistachios work just as well if that is what you have.
- Melted butter. Binds everything together and helps the base toast to a golden finish.
Before you Begin
If you have not made the lemon curd yet, start there. You will need it fully cooled before it goes into the mousse.
Our Lemon Curd Made from Scratch comes together in under 30 minutes, keeps in the fridge for up to two weeks and is worth having on hand well beyond this recipe. Silky, sharp and full of citrus brightness. It is just as good over toast, cake or scones.
Once your lemon curd is made and cooled, you’re ready to begin.

.
Toast the base. Crush the digestive biscuits and mix with brown sugar, shredded coconut, chopped almonds and melted butter until combined. Spread onto a lined baking tray and bake until golden. Leave to cool completely before dividing between your glasses or jars.


.
Make the Mousse: Whisk the ricotta and lemon curd together until completely smooth. In a separate bowl whip the cream with icing sugar and vanilla extract until soft peaks form.
Fold gently. Add the whipped cream to the lemon and ricotta mixture in batches, folding with a light hand until the mousse is combined and airy. Do not rush this step.
- Pipe or spoon the mousse over the cooled biscuit base in each glass.
- Spoon a little extra lemon curd over the top.
- Finish with a small rosette of whipped cream, a few fresh berries and a sprig of mint if you like.
- Chill for at least two hours before serving.

.
Helpful Tips & Tricks
- Whip to soft peaks only. Stop as soon as the cream holds a gentle shape. Overwhipped cream makes the mousse stiff and grainy rather than light and silky.
- Use full fat ricotta. Low fat versions tend to be watery and will not hold the structure the mousse needs. Full fat gives you that smooth rich base that makes every spoonful feel indulgent.
- Fold gently. When combining the whipped cream with the lemon curd mixture use a light hand and fold rather than stir. This is what keeps the mousse airy. Rushing this step deflates everything you just whipped.
- Cool the base completely before adding the mousse. Warm biscuit will melt into the cream and blur the layers. Let it come to room temperature fully before spooning the mousse on top.
- Use homemade lemon curd if you can. The flavour is brighter, fresher and more nuanced than anything from a jar. Our lemon curd recipe is on the blog if you need it.
- Chill for at least two hours before serving. This is when the mousse sets properly and the flavours come together. Made the day before it is even better.
- On the glass or jar size. A 250 to 300ml wide glass works best and gives you four generous portions. Smaller glasses will give you more servings but less of that satisfying layered effect visible through the sides.
- Reserve some lemon curd for the top. A small pool of lemon curd spooned over the mousse just before serving makes it look considerably more elegant and gives each spoonful an extra hit of citrus right at the start.
Can I use store bought lemon curd? Yes, but homemade makes a noticeable difference. The flavour is brighter, fresher and more nuanced than anything from a jar. Our lemon curd recipe is on the blog if you want to make your own.
What can I use instead of ricotta? Full fat mascarpone works beautifully and gives the mousse a slightly richer, creamier result. Greek yoghurt is a good alternative if you want something with a little more tang. Avoid low fat versions of either as they tend to be too watery to hold the structure.
Can this mousse be frozen? It is best kept chilled rather than frozen. Freezing changes the texture and makes it grainy once thawed. It keeps well in the fridge for up to three days so there is rarely a need to freeze it.
How long does it keep? Up to three days in the fridge, covered. The flavour actually deepens slightly overnight making it an ideal make ahead dessert.
Can I make this as a large trifle instead of individual jars? Yes. Layer everything in a glass dish for a shared dessert. Adjust the base quantity slightly to cover the larger surface area and follow the same chilling time before serving.
If you make this recipe I’d love to hear how it turned out. Leave a comment below and let me know. It genuinely makes a difference to know what’s working and what isn’t, and I read every single one. You can also find me on Pinterest, Instagram and Facebook where I share new recipes, behind the scenes and whatever else is happening in the kitchen at Poetry of Spices.

Ingredients
For the biscuit base
For the mousse
To garnish
method
For the Biscuit Base
(3–4 digestive biscuits)
(1½ tbsp brown sugar, 3 tbsp shredded coconut, 3 tbsp chopped almonds, 3 tbsp melted unsalted butter)For the Mousse
(250ml ricotta cheese, 1 cup lemon curd)
(400ml heavy cream, 1 tbsp icing sugar, 1 tsp vanilla essence)
2 comments
I couldn’t resist making these after seeing the photos. They looked just as lovely in the glasses as they do on the blog, and the flavour was every bit as good. A wonderful make-ahead dessert.
Melissa Campbell
Hey Melissa, Thank you for taking the time to leave such a lovely comment. It’s always rewarding when a recipe turns out exactly as planned.